| description | In this document, learn about the general approach of deploying a Medusa project. This includes how to deploy the backend, admin, and storefront. |
|---|
import DocCardList from '@theme/DocCardList'; import { getCategoryItems } from '@site/src/utils/get-first-category-item';
In this document, you’ll learn about the different ways you can deploy your Medusa v1 project.
This guide is intended for Medusa v1 users. If you're a Medusa v2 user, consider using Medusa Cloud. By using Medusa Cloud, you can avoid the complexities and challenges of self-hosting, while benefiting from automated deployment, scaling, and maintenance.
With Medusa Cloud, you also maintain full customization control as you deploy your own modules and customizations directly from GitHub:
- Push to deploy.
- Multiple testing environments.
- Preview environments for new PRs.
- Test on production-like data.
Refer to the Cloud vs. Self-Hosting comparison guide for more details.
A standard Medusa project is made up of the following:
- Medusa backend
- Medusa Admin
- One or more storefronts
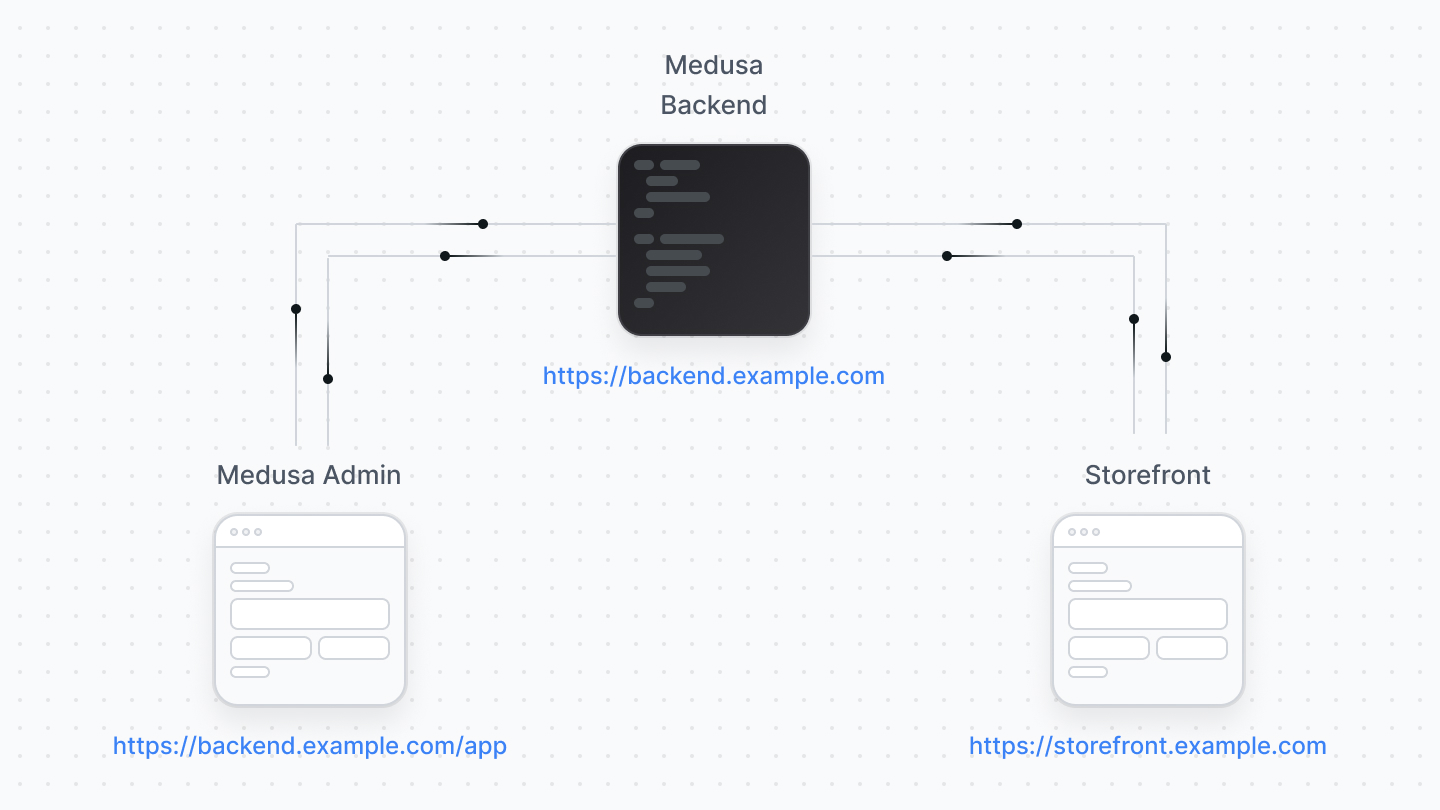
This guide details options to consider when deploying each of these components in your Medusa project.
You must deploy the Medusa backend before the admin or storefront, as both of them connect to the backend and won’t work without a deployed Medusa backend URL.
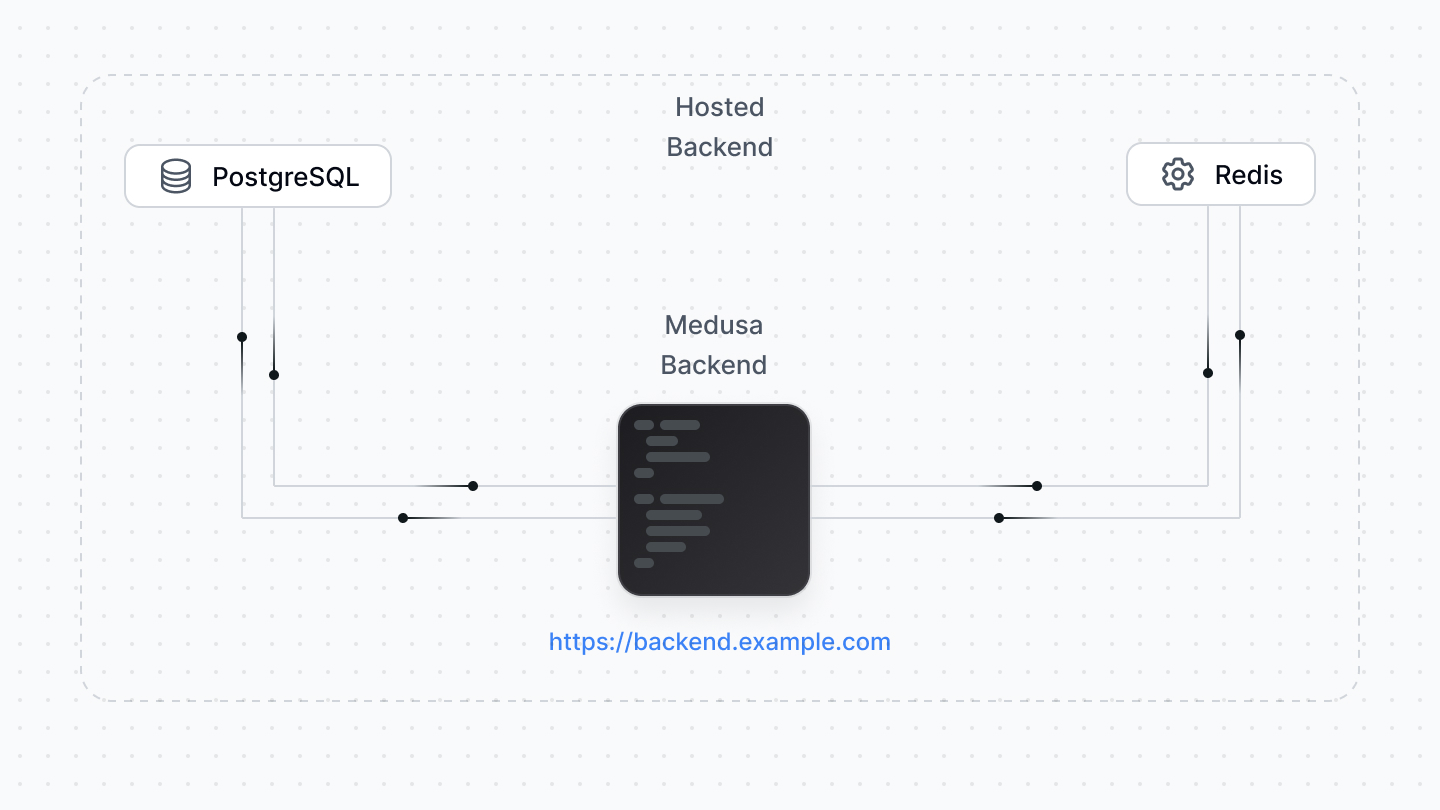
The Medusa backend is a Node.js server. So, it must be deployed to a hosting provider that supports deploying servers, such as Railway, DigitalOcean, AWS, Heroku, etc…
:::tip
For optimal experience, make sure that the hosting provider and plan offer at least 2GB of RAM.
:::
Your backend connects to PostgreSQL and Redis databases. Most hosting providers support deploying and managing these databases along with your Medusa backend (such as Railway and DigitalOcean). You can also choose a separate hosting for either of them and connect to them with Medusa’s configurations.
<DocCardList items={getCategoryItems({ categoryCustomId: "deploy_backend" })} />
There are two options to deploy the Medusa Admin:
Since the Medusa Admin is a plugin installed in the backend, you may choose to host it along with the backend.
In this scenario, make sure the hosting provider and plan of your choice provide at least 2GB of RAM, as the admin build requires high RAM usage.
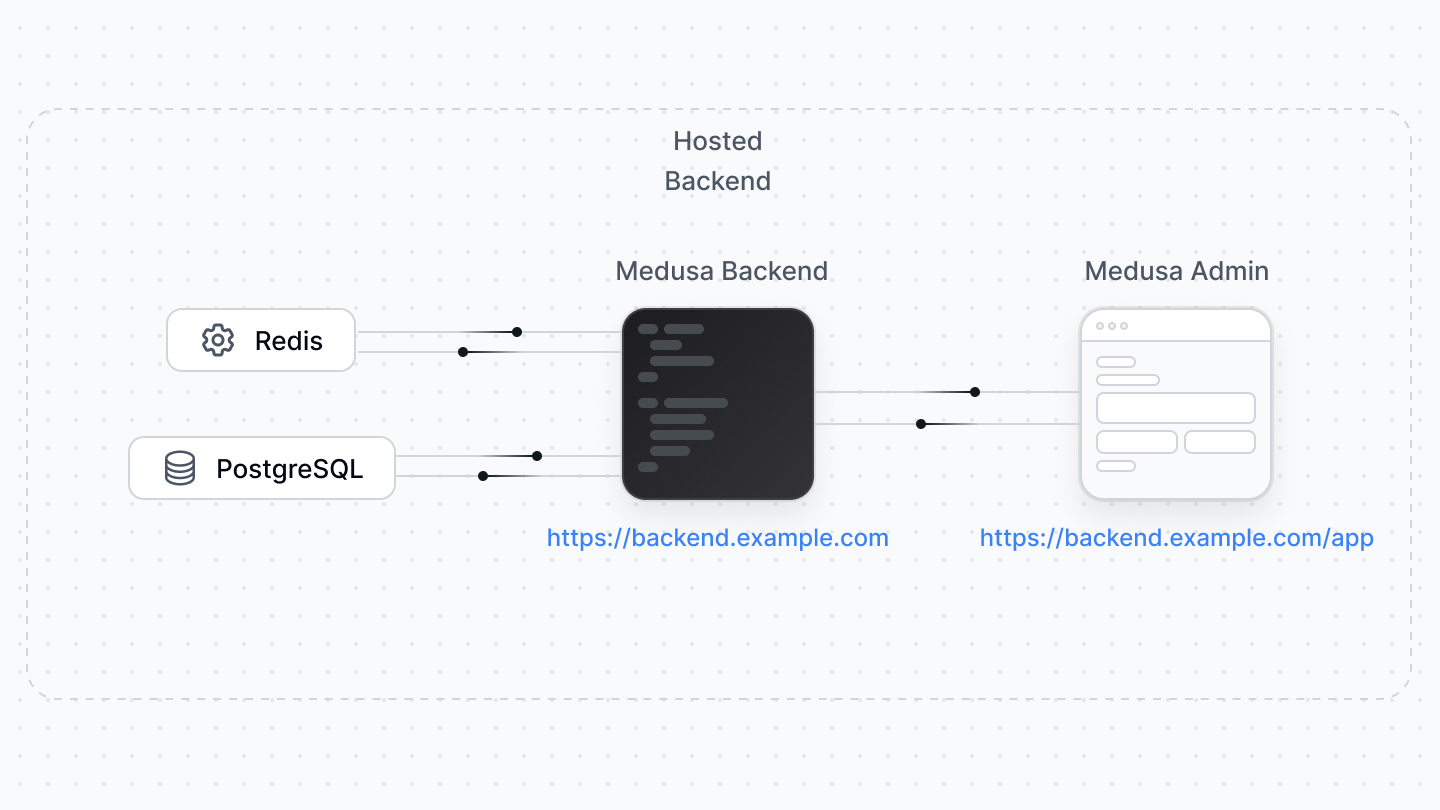
The backend deployment guides mention details on how to deploy the admin along with the backend.
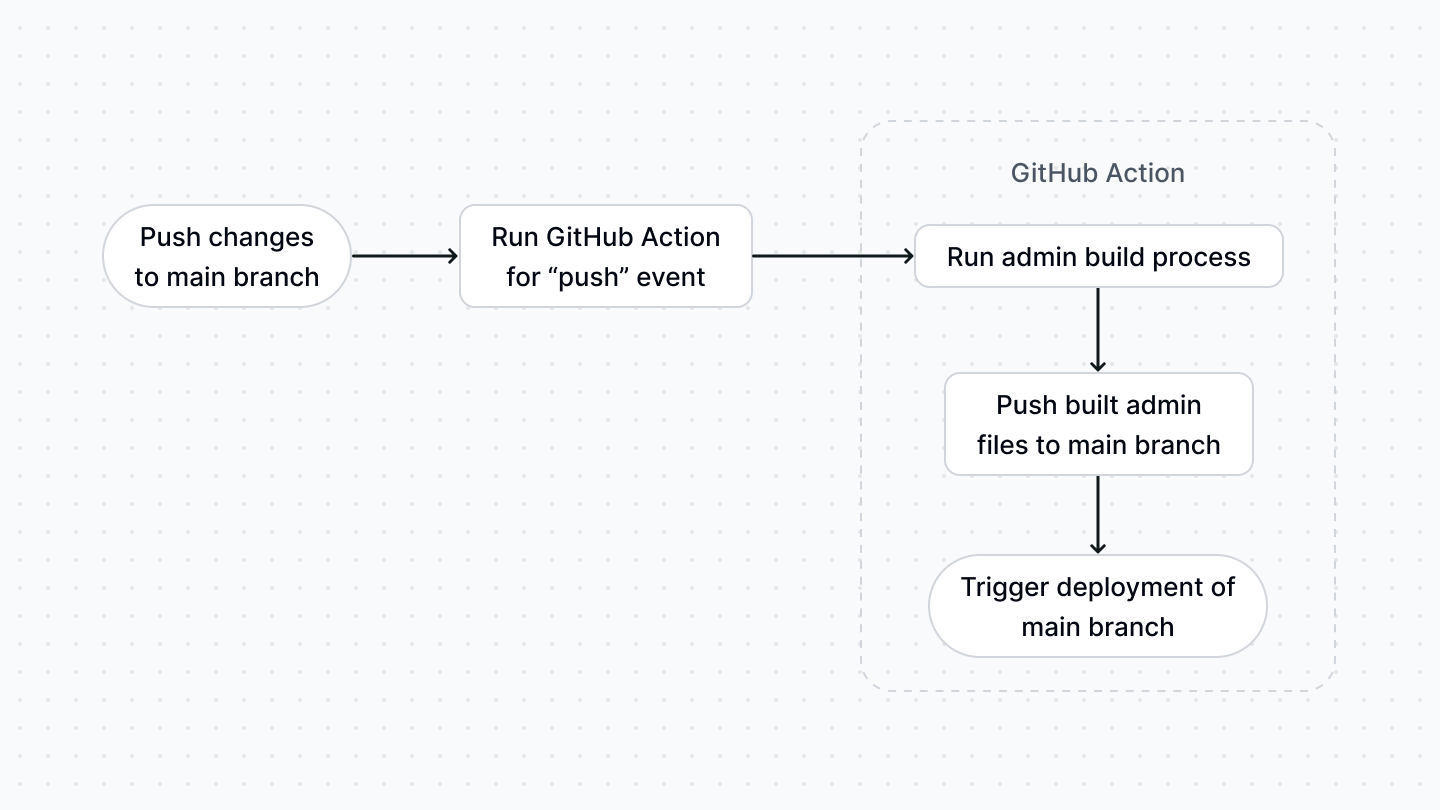
Alternatively, if you host your backend’s code on GitHub, you can:
- Disable the
autoRebuildoption of the admin plugin. - Create a GitHub action that builds the admin before the deployment is triggered.
With this solution, the hosting provider doesn’t handle the admin building, decreasing the RAM usage.
You may choose to deploy the admin into a separate hosting provider or instance. The admin can be hosted on providers that support front-end websites and frameworks, such as Vercel.
:::note
As per Vercel’s license and plans, their free plan can only be used for personal, non-commercial projects. So, you can deploy the admin on the free plan for development purposes, but for commercial projects, you must update your Vercel plan.
:::
<DocCardList items={getCategoryItems({ categoryCustomId: "deploy_admin" })} />
The storefront is deployed separately from the Medusa backend, and the hosting options depend on the tools and frameworks you use to create the storefront.
If you’re using the Next.js starter, you may deploy the storefront to any hosting provider that supports frontend frameworks, such as Vercel.
:::note
As per Vercel’s license and plans, their free plan can only be used for personal, non-commercial projects. So, you can deploy the storefront on the free plan for development purposes, but for commercial projects, you must update your Vercel plan.
:::
<DocCardList items={getCategoryItems({ categoryCustomId: "deploy_storefront" })} />