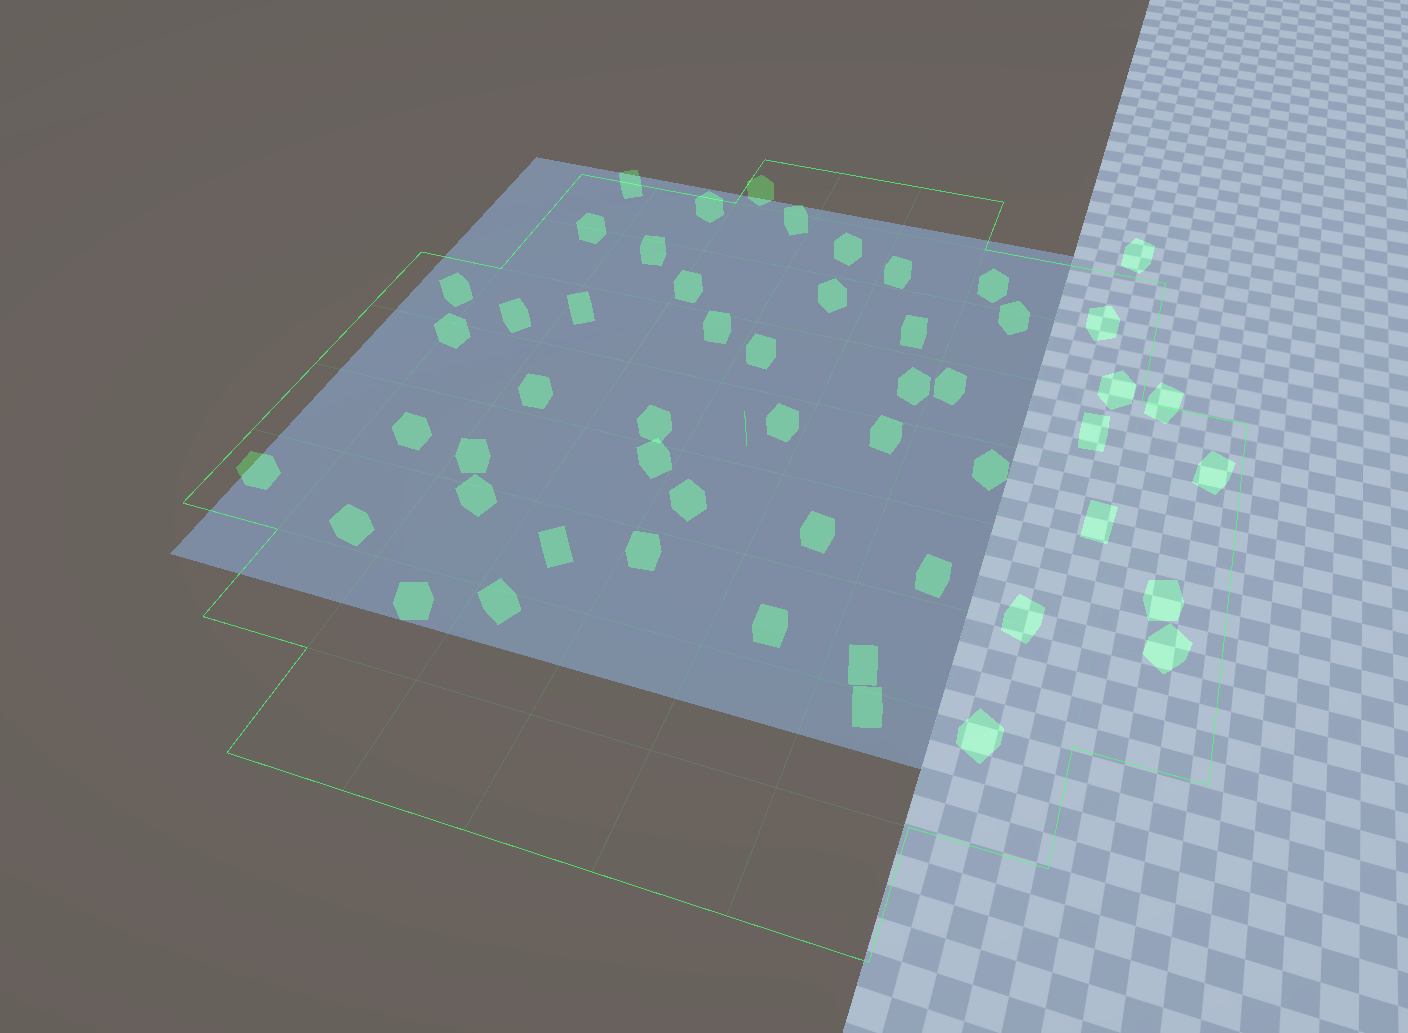
Editor-only Unity tool that paints prefabs onto whatever surface you are looking at in the Scene view. Every instance is snapped to the point under the cursor and rotated to the face it landed on, so props stand correctly on floors, walls, ramps and ceilings without any manual rotation.
- Paint on colliders, with a raw
MeshFilterfallback for geometry that has none - Instances align to the hit face, with a blend slider between world up and the face normal
- Click to place, or hold and drag to lay down an evenly spaced stroke
- Brush radius and density to scatter several instances per dab
- Min Distance stops instances from stacking on top of each other
- Slope Range limits a stroke to floors, walls or ceilings
- Named palettes, each with its own prefabs, weights and selection, and optionally its own density, yaw and scale range
- Select several prefabs at once and share the brush between them in order, at equal odds, or by weight
- Yaw modes: keep the prefab rotation, randomize it, or face a scene object so a painted crowd all looks the same way
- Random scale for natural variation
- Brush presets: a Basic and a Foliage brush to start from, and your own saved alongside them
- Four modes: Paint, Erase, Select and Replace
- Ctrl (Cmd on macOS) flips to the eraser, which only removes palette prefabs by default
- Dockable palette window with thumbnails, drag and drop, and folder import
- Scene view overlay toggle so the brush can be armed without the window open
- Full undo support, and painting works inside prefab mode
- Unity 6.3 (
6000.3) or newer - Editor-only: no runtime code or dependencies
In Unity, open Window > Package Manager, click + > Add package from git URL, and paste:
https://github.com/innocentmiau/MiPrefabsPainter.git
To pin a specific release, append the tag:
https://github.com/innocentmiau/MiPrefabsPainter.git#v1.1.0
Alternatively, add it directly to your project's Packages/manifest.json:
{
  "dependencies": {
    "com.andreleandrodev.miprefabspainter": "https://github.com/innocentmiau/MiPrefabsPainter.git#v1.1.0"
  }
}- Open Tools > Mi Prefabs Painter.
- Fill the palette: drag prefabs or a whole folder onto the drop area, or select prefabs in the Project window and press Add Selected.
- Click a thumbnail to paint just that prefab. Ctrl click adds more prefabs to the selection and Shift click takes a range; when several are selected the brush picks between them with equal odds. All and None next to the Painting label select the whole palette or clear the selection. Right click a thumbnail for Select Only, Toggle In Selection, Ping In Project or Remove.
- Turn Painting: ON in the window toolbar, or use the Paint toggle in the Scene view overlay.
- Aim at a surface in the Scene view. Translucent ghosts show the whole dab the click would make: one per scattered instance, each with the prefab, rotation and scale it would get, with the ring marking the brush and the pin marking which way up they will stand.
- Click to place one dab, or hold and drag to paint a stroke. Shift+scroll resizes the brush, Ctrl+Shift+scroll changes its density.
- Hold Ctrl (Cmd on macOS) to erase, or switch to the Erase mode button to keep the eraser active.
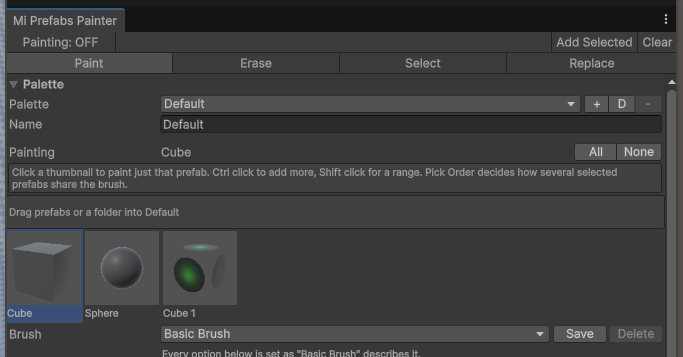 The palette, the brush name at the top, and the option sections below it.
| Mode | What a click does |
|---|---|
| Paint | Places instances on the surface under the cursor. |
| Erase | Removes painted instances under the brush. |
| Select | Selects painted instances in the hierarchy without disarming the brush. Selects the prefab root, not the mesh child the ray landed on. Drag to sweep several in, Ctrl to toggle one. |
| Replace | Swaps painted instances for the prefab the brush would paint, keeping position, rotation, scale, parent and sibling index. Palette prefabs only. |
Ctrl flips to the eraser and back from any mode except Select, where it adds to the selection instead. Paint On Drag and Stroke Spacing apply to painting only, so sweeping the eraser, the selector or the replacer always works.
Every placement and erase is a normal undo step.
| Type | Example |
|---|---|
| Holding Paint | 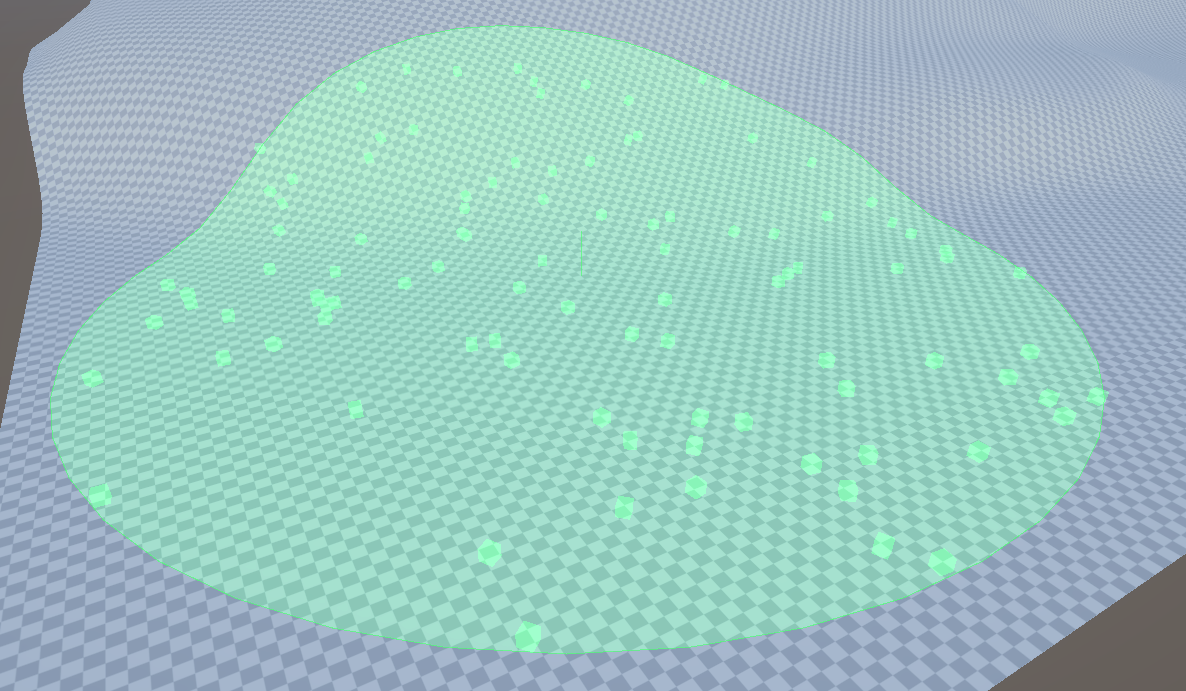 |
| After Paint | 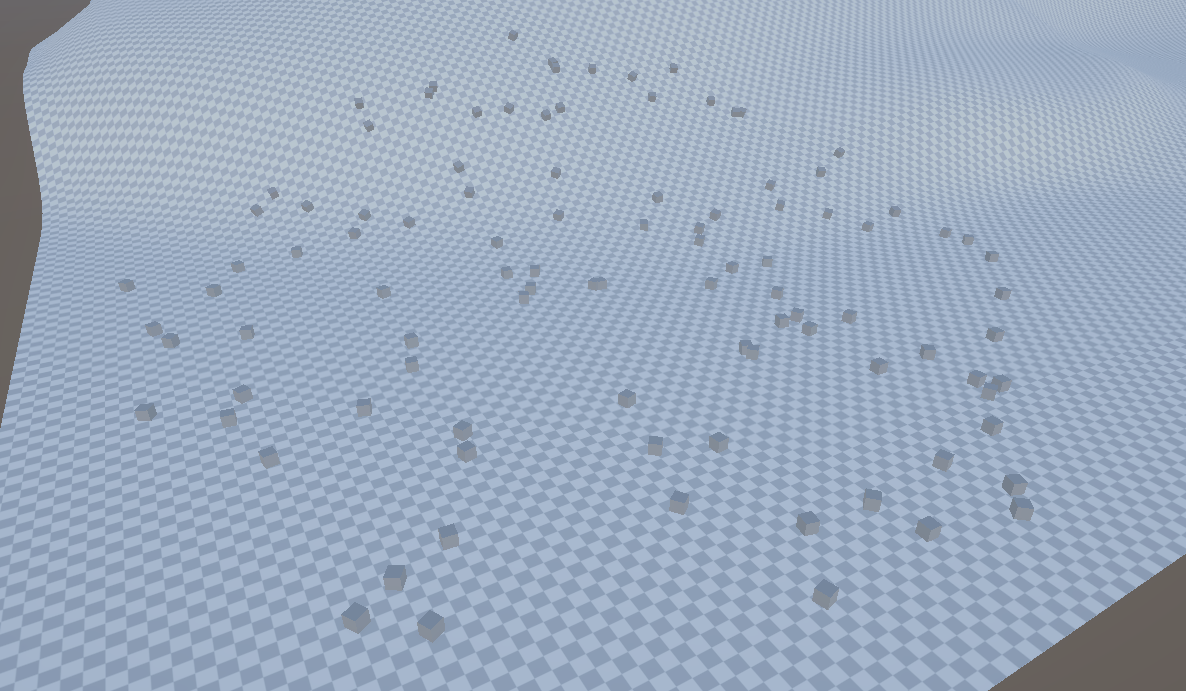 |
| Holding Erase | 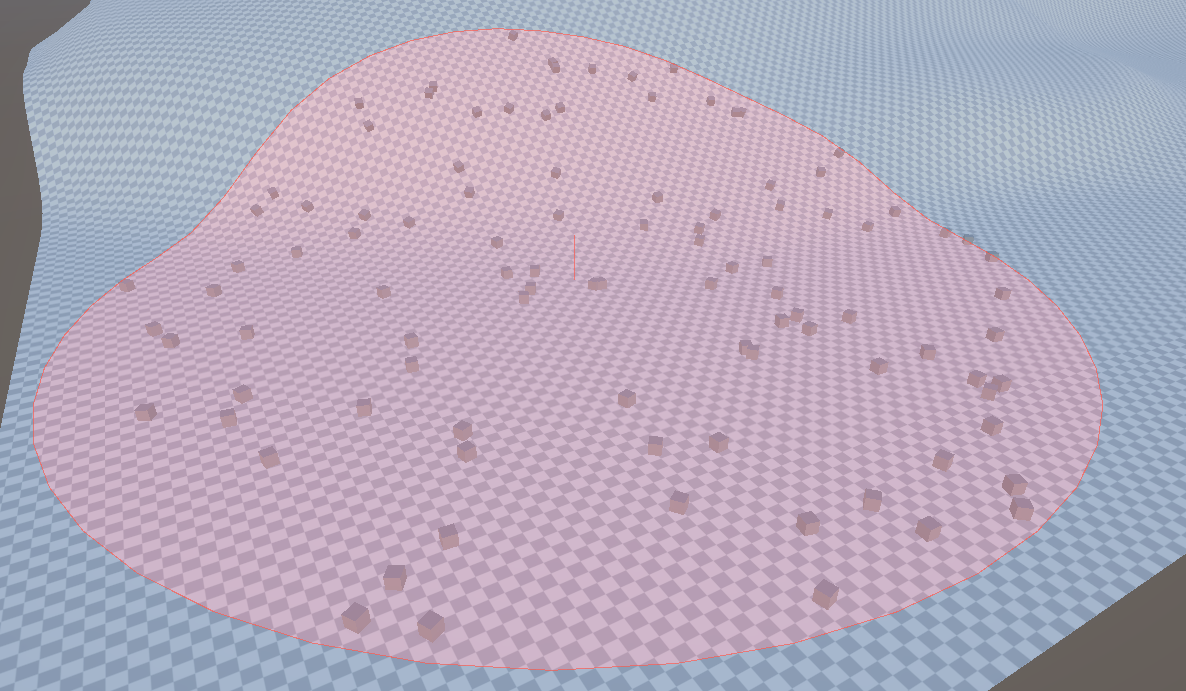 |
| After Erase | 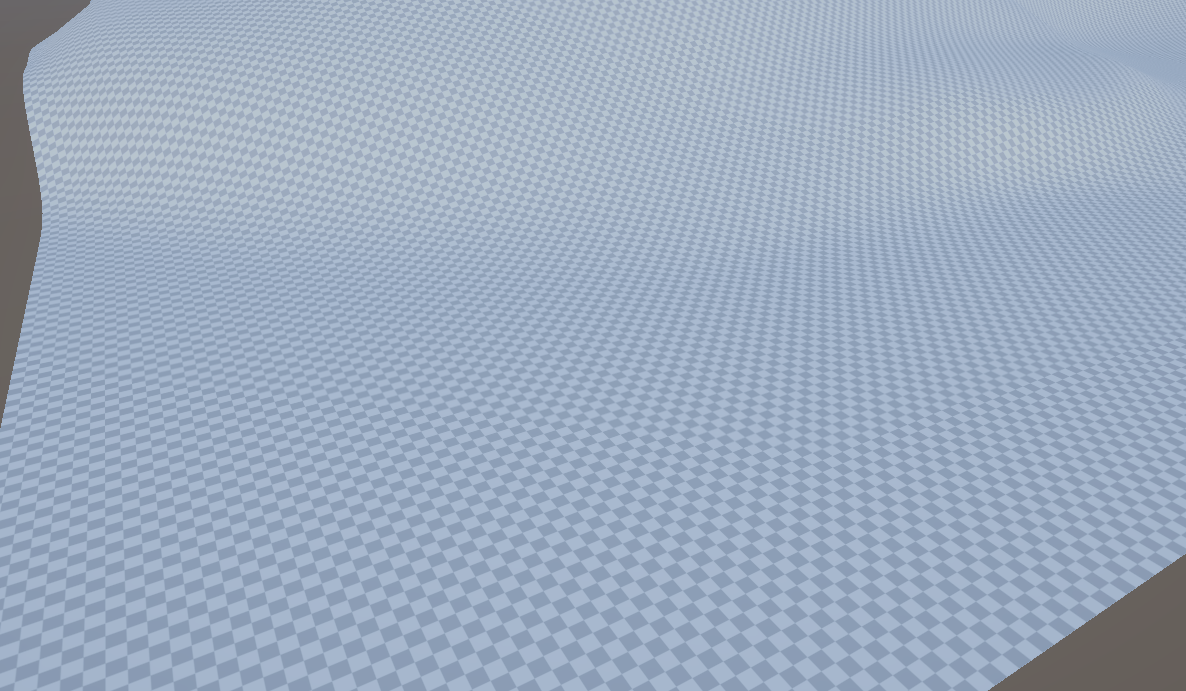 |
A brush is a whole setup under one name, shown at the top of the options. Picking one from the list sets every option below it in a single step, which is the quickest way to get from "which of these do I need to touch" to painting.
Two ship with the tool and cannot be deleted:
| Brush | What it is for |
|---|---|
| Basic Brush | Placing props by hand. One instance per click, no filling and no lattice, so a click puts down exactly what the cursor is over. |
| Foliage Brush | Covering ground. Fills to a density instead of adding on every click, seats instances on the surface, varies their scale and lean so a patch does not read as machine placed, thins on the lattice so a patch can be filled again without drifting, and holds to slopes under fifty degrees. |
Save stores the current options as a brush of your own; saving under a name you already used replaces it. Delete removes one of yours. Change any option afterwards and the name goes back to None (custom), which is how you can tell at a glance whether you are on a known setup or one of your own.
The Radius is deliberately not part of a brush. It is the option that changes constantly while working, with Shift and the wheel, and a brush that came undone every time you resized would be worthless. Neither are the things that belong to the scene rather than to the brush: the Layer Mask, the Scope Root, the Parent, and the palette itself.
Nor is anything in the Settings section. Those are preferences about how the tool behaves rather than about what it paints, so they hold still while brushes are swapped underneath them.
The window is split into collapsible sections: Palette, Surface, Orientation, Brush, Foliage, Settings and Output. Each remembers whether you left it open. Everything down to Foliage is part of a brush; Settings deliberately is not.
Options that depend on a switch above them are indented under it and appear only once it is on, so what is on screen is always what is actually in effect. Where an option is being decided elsewhere, the row says so and shows the value rather than greying out: with Fill To Density on, for instance, Density in the Brush section reads from Fill To Density, in Foliage, and with Auto Spacing on, Min Distance shows the spacing being worked out for you.
| Option | What it does |
|---|---|
| Layer Mask | Layers the paint ray is allowed to hit. |
| Sit On Surface | Seat the instance by the bottom of its renderers instead of by its pivot, so props rest on the surface no matter where the pivot was authored. |
| Surface Offset | Push the instance along the face normal after placing it. Applies on top of Sit On Surface. |
| Slope Range | Which faces accept paint, as the angle between world up and the face. 0 is a floor, 90 is a wall, 180 is a ceiling. The brush ring turns grey on a face outside the range. |
| Option | What it does |
|---|---|
| Align To Face | Rotate the instance so its up axis matches the face it was painted on. |
| Normal Blend | 0 keeps the prefab upright, 1 fully matches the face. |
| Yaw | What decides the spin around the face. Keep Prefab leaves the authored rotation, Random scatters it, Face Target turns every instance to look at one scene object, Along Stroke turns them to follow the drag. |
| Face Target | The scene object instances turn towards in Face Target mode. Only the spin around the face changes, so instances keep standing on the surface. |
| Yaw Offset | Extra spin in degrees applied after the yaw above. Use it when the model's forward axis is not +Z, or 180 to face away from the target. |
| Random Tilt | Largest random lean away from the face, in degrees, in a random direction around it. A couple of degrees stops a scatter looking machine placed. |
| Randomize Scale | Multiply the prefab scale by a random factor between Min and Max. Uniform rolls one factor for all three axes and keeps the prop in proportion; turn it off to roll each axis separately, which is what makes a row of the same bush read as different plants. |
| Option | What it does |
|---|---|
| Radius | World radius of the brush. 0 places a single instance exactly under the cursor. |
| Density | How many instances one dab scatters inside the radius. Each scattered point is re-cast against the surface, so instances follow the geometry. |
| Min Distance | Smallest allowed world distance between two painted instances. 0 lets them overlap freely. A second ring on the brush shows the distance. |
| Pick Order | How the brush walks a multi prefab selection. Sequential cycles them in palette order for a perfectly even spread, good for fences and paths. Random is even on average but clumps, good for scatter. Weighted rolls against the per prefab weight shown on each thumbnail. |
| Paint On Drag | Keep painting while the mouse is held down and moved. |
| Max Per Stroke | Ceiling on how many instances one press-drag-release can create. 0 removes the ceiling. The scene view hint shows the running count while you drag. |
| Stroke Spacing | Minimum world distance between two dabs of the same stroke. |
| Erase Palette Only | Restrict the eraser to prefabs that are in the palette, so it cannot delete the surface you are painting on. |
| Option | What it does |
|---|---|
| Fill To Density | Treat density as a target for the ground under the brush instead of an amount to add. Each dab counts what is already there and adds only the shortfall, so painting over full ground adds nothing. |
| Density | Instances per square metre to fill up to. Filling uses a world-anchored lattice of cells of side 1/sqrt(density), one instance per cell, so painting over ground that is already planted finds every cell taken and adds nothing. The lattice is drawn in the Scene view. |
| Cell Jitter | How far inside its own cell an instance may wander. 0 is a rigid lattice, 1 lets neighbouring cells touch. |
| Auto Spacing | Derive the minimum distance from the cell size and jitter instead of using Min Distance. Catches neighbours that jittered towards their shared border, and can never leave ground unfillable. |
| Erase Density | Instances per square metre the eraser leaves standing. 0 clears the brush; anything above it thins the patch down to that density. Which instances go is chosen at random across the brush, unless Erase On Lattice is on. |
| Erase On Lattice | Thin by lattice cell instead of at random, leaving one instance per cell. Cells holding more than one lose the extras first, then whole cells go, spread evenly across the brush. Survivors then sit where filling expects them, so a patch can be thinned and filled again without drifting. |
| Grid Alignment | What the lattice is anchored to. World lays it out on the world axes. Scope Root lays it out on the Scope Root's own axes, which is what a rotated terrain wants so the lattice follows it instead of cutting across it at an angle. The root's scale is deliberately ignored, so the cell size stays a real world distance and the density keeps meaning what it says. |
| Scope Root | The object whose children are scanned for instances that are already placed. Point it at the parent everything painted lives under, e.g. Terrain. Leave it empty to scan the whole scene, which is correct but much slower. Rescan re-reads it. |
Only instances of the prefabs currently selected count toward the target, so a patch of grass is not considered full because rocks were painted there earlier. Min Distance still keeps its distance from every painted instance regardless.
While filling, the ghost previews the shortfall - ground already at its target density draws no ghosts at all, which is how you see where there is still work to do.
How the tool behaves, as opposed to what the brush paints. Nothing here is saved into or loaded from a brush, so it holds still while brushes are swapped.
| Option | What it does |
|---|---|
| Mesh Fallback | Raycast MeshFilter geometry when nothing with a collider was hit. The mesh needs Read/Write enabled in its import settings. |
| Spawn Only In Meshes | Only place where the brush actually finds a surface. On by default. The brush is a disc in the plane of the face it is aimed at, so a brush wider than what it is aimed at hangs over open space, and a scattered point out there has nothing to stand on. With this on such a point is dropped, which means a dab can place fewer instances than Density asks for when part of the brush is over nothing. Turn it off to place those points on the plane of the face instead, which puts instances past the edge of the ground. |
| Force Full Density | Shown under Spawn Only In Meshes. Keep throwing points at the brush until the density is met, instead of giving up on the ones that found no surface. Turn it on when the brush is much wider than what it is painting: the dice otherwise find the mesh so rarely that a click can place nothing at all, which on a large scene is not something you notice without going to look. Bounded by a fixed budget of tries per instance, so a brush aimed almost entirely at open space still gives up rather than hanging. |
| Notification Time | How long the scene view says what a stroke placed, in seconds. Default 3. It fades out over its last second, so anything under one second is only a fade, and 0 turns it off. A stroke that found ground and still placed nothing says so, which is the case worth hearing about. |
| Realistic Area | Highlight the ground the brush will actually reach instead of drawing a flat ring. The ring is a circle on the plane of the face under the cursor and nowhere else, so over a slope or a rise it cuts through the ground and claims area the brush will never touch. This drops the disc onto the surface instead, follows what it lands on, and leaves a gap where there is nothing underneath. Built as a fan of radials, each measured out to its own edge: it walks outward until it leaves the surface, then halves the remaining gap a few times so it stops on the edge itself rather than on whichever sample happened to be the last to land. Between two neighbouring radials the boundary is a straight chord with both ends on the real edge, so a straight edge is drawn straight. Costs a grid of raycasts each time the cursor moves, so it is a choice rather than the only way the brush is drawn. A brush with no Radius is a single point with no area, and keeps the ring either way. Drawn over the scene rather than depth tested against it: the patch is a grid of samples joined by flat triangles, so between samples it cuts under any bump the ground has and would otherwise be poked through in patches. With Spawn Only In Meshes off it also covers the open space instances will then be placed on, faintly and flat on the plane of the face, since that is where they will stand. The two are drawn as separate surfaces rather than one: joined, the triangles straddling the boundary run from the plane to the ground far below and stab out through everything between. |
| Show Ghost | Draw the prefab that is about to be painted as a translucent silhouette under the cursor. Turn it off for very heavy prefabs. |
| Max Ghosts | How many silhouettes the preview may draw at once. Past this it thins out evenly across the brush rather than previewing only part of it. Lower for heavy prefabs, raise to preview a wide foliage brush in full. |
| Ghost Detail | How much of each instance the preview draws. Full is every mesh the prefab carries. Bounds is one box each, so a prefab too heavy to preview at full detail can still be previewed across the whole brush. Points marks where each instance would land and nothing else. |
| Fixed Seed | Start every stroke's random sequence from the same number, so the same stroke over the same ground places the same instances. Worth turning on for a version controlled scene, where an unreproducible scatter is a diff nobody can review, and for making a bug reproducible. |
| Seed | The number every stroke starts from. Change it for a different but equally repeatable scatter. While a fixed seed is set the ghost previews exactly what the click will place, rather than a representative sample of it. |
The Parent field in the window parents every painted instance under a scene object, which keeps the hierarchy tidy. It is remembered for the editor session and resets when you enter Play mode. It is separate from Scope Root: Parent is where new instances go, Scope Root is where existing ones are looked for.
A palette is a named set of prefabs with their weights and their selection. Switching palettes switches the whole brush in one step, so a scene can keep one palette per biome or per prop category. Use + to create one, D to duplicate the current one, - to delete it, and the Name field to rename. The Clear button in the toolbar empties the active palette only.
The eraser and Min Distance recognise prefabs from every palette, not just the active one, so switching palettes never makes the eraser forget what the tool painted earlier.
Per Palette Setup, at the top of the options, moves Density, Yaw, Yaw Offset and the whole Randomize Scale range onto the active palette instead of sharing them. Switching from grass to trees then switches the brush setup with the prefabs rather than leaving it set up for whatever was painted last.
The options themselves do not move or change name; they simply start acting on the palette. Turning it on copies whatever is in force, so the brush does not jump, and turning it off leaves the palette's values where they are so it can be turned back on without losing them. Everything else stays global.
The palettes and all placement options are saved in
ProjectSettings/MiPrefabsPainter.asset, so a team shares the same brush setup.
Whether painting is armed, the current mode and the parent object are session
state, so arming the brush never dirties a version controlled file and the editor
never reopens with the brush still live.
MIT (c) Andre Leandro